NOTICE-Cs3 is the version of photoshop I used, so where the tools are maybe abit different if you use other versions.
Version 1
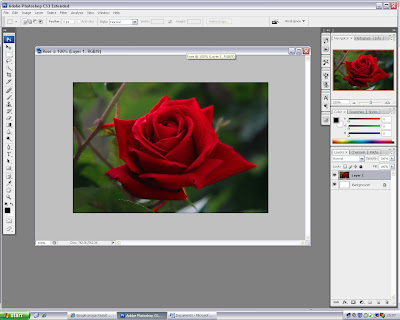 1,First of, choose an image. It is best to choose a good quality image as it will produce a better outcome.
 2, Click on: Image-Adjustments-Desaturate


Version 2

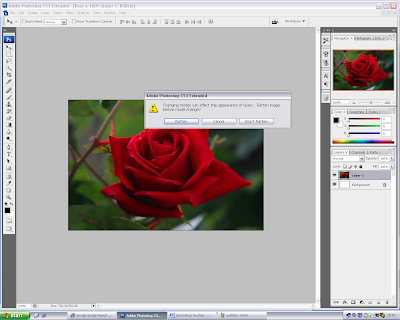
2, When you press Grayscale, this box pops up.
It asks you if you want to Flatten the image. To continue this step, you will need to press Yes.
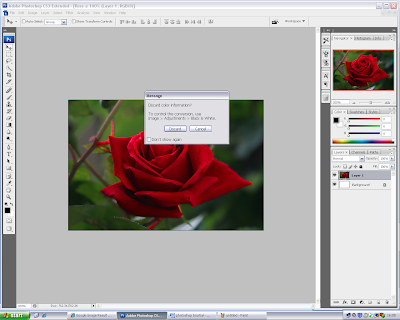
3, After that, another box will pop up. Press Discard to continue.

This is the outcome of your image from Grayscale.

4, Click on: Image-Mode-Bitmap
 5, This box will appear after you clicking those steps. In this box, go to the bottom and choose Halftone Screen.
 6,When this box appears..


Before

At the end, it is your choice in which version you want to use and which one you find easier. Though there is other ways to do so. Such as separating the white and black, so you end up getting two image, one is the remaining black parts and the other image, the remaining white parts.
Version 1
 1,First of, choose an image. It is best to choose a good quality image as it will produce a better outcome.
The image will end up with three tones, white, black and
grey.

Which gives you this outcome.

3, Click on: Image-Adjustment-levels
This is the final step in this version, in creating a film positive.
Using levels can allow you to turn the image to white and
black only, this is what you would want to create a film positive.
To do this, you will need to trust your own instincts!!

When you click on Levels, this Histogram will appear.
To use this, Move the triangles that are under the Input
levels. When moving them, you would see the difference within your image.

The outcome, after using levels.

Before

After
Version 2

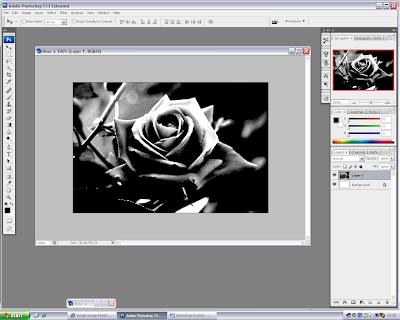
1, Click on: Image-Mode- Grayscale
Grayscale turns the image, black and white.

2, When you press Grayscale, this box pops up.
It asks you if you want to Flatten the image. To continue this step, you will need to press Yes.

3, After that, another box will pop up. Press Discard to continue.

This is the outcome of your image from Grayscale.

4, Click on: Image-Mode-Bitmap


Within the Shape box choose Round.
In Frequency you
will have to experiment with it. I normally use go for: 15,20,36,40.

The outcome of using Frequency 25.
If you look closely you can see the dots.
If you zoom in and the white dots are circle, it means your image is
good quality. If not then, it shows it is not that good quality but it still
works. But just not as well.

If you zoom out, the image would look more darker and
pixelated.

Before

After
At the end, it is your choice in which version you want to use and which one you find easier. Though there is other ways to do so. Such as separating the white and black, so you end up getting two image, one is the remaining black parts and the other image, the remaining white parts.
Happy photoshopping!! :)
No comments:
Post a Comment