Welcome To This Blog Please Enjoy And Have Fun!!! =^o^=

If you have any request or anything to say please speak your thoughts honestly! :)

Tuesday, 15 May 2012

CYMK Photoshop CS3 tutorial

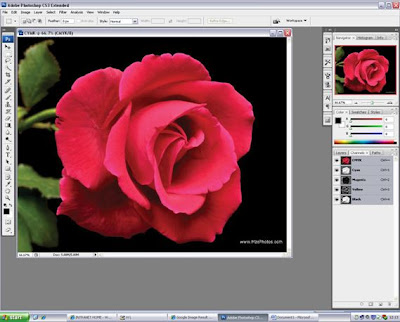
To begin, load up Photoshop CS3 and find an image.


When you got your image load it in Photoshop.


Go to: Image-Mode.


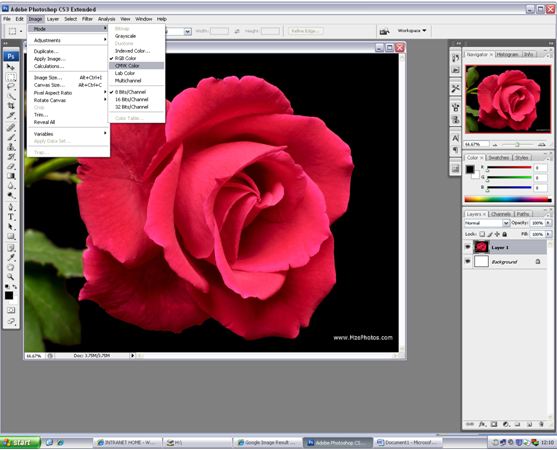
Click on CYMK Color.


When you press on CYMK color this box will appear.
Click flatten.


At the bottom where the “Layer” box is, click on “Channels”.


Now there is 5 layers and this is the ultimate outcome of all the layers together, creating these colours.


Cyan


Magenta


Yellow


Black


If you don’t like one of the colour enough, you can always go to: Image, Adjustment, Curves

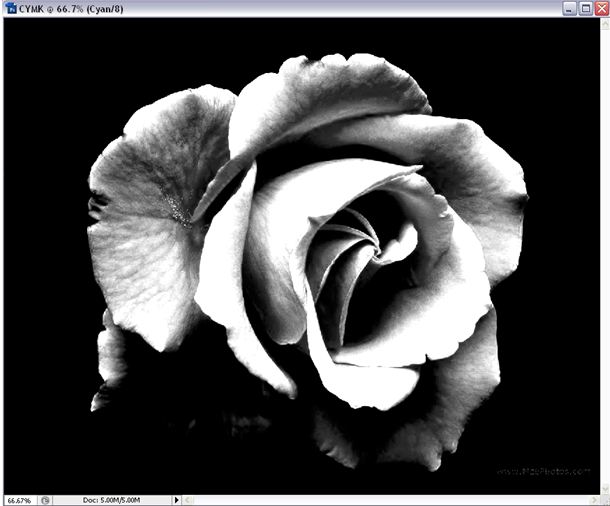
I chose to use cyan as an example.


This box will appear, drag the blue line around to see what it can do, experiment with it.

Hint: As you can see, in the box the Channel says Cyan. If you did not click on Image,mode, CYMK Color. The Channel would not say any of the CMYK colours!


Playing with Cyan. This is what I done. 
When you come to the outcome that you like it press ok.


BEFORE


AFTER


Now go on the main one, CYMK and your image will look darker.


AFTER


BEFORE


You can edit all of the layers, not just one! 
Happy Editing poeple! :)


Wednesday, 9 May 2012

Video installation research

Watching some video installation work, as inspiration. Giving me ideas on how to do my own video installation later on. Here are some small notes on what I personally think of these videos...


Video Installation at Biennale Santa Cruz 2010, by SONIA FALCONE
This video is quite interesting, showing how strips of light can do and how it can be seen differently when it is in different angles. Such as giving out different emotions. With the music going on with it, it makes me remember the Beijing Olympic opening ceremony. Where the people come up and down, pretending to be technology and the use of the light when they hit the drums.


Amazing Sand Art on Ukraine's Got talent - Kseniya Simonova

I liked the fact that the story is being in told in a new way and how one picture changes from another, without wiping all the sand out. It's amazing how people manages to do this with sand and a light box. Stuff that you can easily get your hands on.


Sam Taylor Wood-Still Life


This video is quite interesting, it shows how a bowl of fresh fruit can become within days. It shows the power of micro organisms. Though from this we learn what kind of fruit mould first and the fastest. 
However it does make fruit look less appealing and make you think twice about fruits. As these days all fruit and veg are forced to grow quicker, so they use this chemical. You don't know what harm the chemical can do to your body and if the fruit moulded, you would not know what it would be like.

.Sam Taylor Wood-A little Death


The rabbit decaying it pretty much showing what will happen to us humans as well, once we get buried. As nothing is going to stop the maggot from eating the body. Along the fact that humans and other living species are also biodegradable.


Sam taylor wood-hysteria


This video makes you think, why is she laughing and what is she laughing at. It also shows her emotions. As she laughs it how changes, her body automatically moves without her control. Such as her face slowly turns red. Though the bad side is, when people laugh, they are not breathing. So this moment when she is laughing, she is losing oxygen. 


David Lynch-Alphabet


This video is cleverly done to show the Alphabet, but very creepy in my own opinion. When you think of someone learning ABC, it would be children's, so the video would be cute, but this is the opposite, it is like a nightmare.
However I like the mixture of footage, from a live person to stop motion, slowly entering the letter one by one. Then use of the shapes and the human face making the letter is clever, yet scary. 
showing Alphabet is a whole new way. 
6 min of stuff-Getting Destroyed


This video is quite interesting as it shows things getting destroyed in details. The part that the naked eye does not see clearly. I like the fact that this person kept some part of the clips in its original speed and the rest slow motion, to make it seem more dramatic. Along all the things happening are simple daily use things.


Simon Ellis-Telling Lies


This video is pretty much telling a story by one word at a time. A girl and boy voice BUT both voice are from films, so the voice are several different males and females. Simon Ellis went through alot of films to find the right tone of the word, to show the story emotion.
By watching this video and reading the word along with it, your mind will automatically imagine the scenery. 


Ukrainian independence Building Wide Projector Show


A idea you would never thought of, projecting the independence building with other effects within the independence building itself. It is cool on how many effects it can do and show, without looking daft. However after watching it for few minute it does seem abit dull and abit dragged on.


Kye Wilson-The kiss 
The video is quite weird but I like the idea of it though. How Kye Wilson made this video like an illusion work. When it simply is people covered in a cloth/sheet of material. At first it did not look like that, until the footage was filmed in another angle that's when I notice it was a human under a piece of material. 


Monday, 7 May 2012

Photoshop What is CYMK?

CYMK: Cyan-Magenta-Yellow-Black
CYMK is a colour  model where it is a four colour process. Using four colours (Cyan-Magenta-Yellow-Black) to create a image. For example, if you look at the photo at the bottom, the person face. from far away you see it like a normal photo, but if you look closely it is not. The second photo is a close up of the person face. As you can see the colour forms a pattern.


You can create a CYMK photo on Photoshop. You can find the tutorial in another post on this blog soon.

Sunday, 6 May 2012

Photoshop tutorial, creating film positive in 2 ways.

NOTICE-Cs3 is the version of photoshop I used, so where the tools are maybe abit different if you use other versions.

Version 1

1,First of,  choose an image. It is best to choose a good quality image as it will produce a better outcome.


2, Click on: Image-Adjustments-Desaturate

The image will end up with three tones, white, black and grey.


Which gives you this outcome.


3, Click on: Image-Adjustment-levels

This is the final step in this version, in creating a film positive.

Using levels can allow you to turn the image to white and black only, this is what you would want to create a film positive.
To do this, you will need to trust your own instincts!!


When you click on Levels, this Histogram will appear.
To use this, Move the triangles that are under the Input levels. When moving them, you would see the difference within your image.


The outcome, after using levels.


Before


After


Version 2

1, Click on: Image-Mode- Grayscale

Grayscale turns the image, black and white.


2, When you press Grayscale, this box pops up.
 It asks you if you want to Flatten the image. To continue this step, you will need to press Yes.


3, After that, another box will pop up. Press Discard to continue.


This is the outcome of your image from Grayscale.


4, Click on: Image-Mode-Bitmap


5, This box will appear after you clicking those steps. In this box, go to the bottom  and choose Halftone Screen.


6,When this box appears..

Within the Shape box choose Round.
In Frequency  you will have to experiment with it. I normally use go for: 15,20,36,40.


The outcome of using Frequency 25.
If you look closely you can see the dots.
If you zoom in and the white dots are circle, it means your image is good quality. If not then, it shows it is not that good quality but it still works. But just not as well.


If you zoom out, the image would look more darker and pixelated. 


Before


After


At the end, it is your choice in which version you want to use and which one you find easier. Though there is other ways to do so. Such as separating the white and black, so you end up getting two image, one is the remaining black parts and the other image, the remaining white parts.

Happy photoshopping!! :)

How to print screen

A step by step guide in how to screen print, including tips!

Before printing, you will need to have a large space to work in.

-When you got you area, you should wear a apron and move away any food or drink that you may have.
-Following that, layout some newspapers so when you print, you would not get any medium (paint) onto your table or other surface.
- Now get your screen board and your mesh. If your using film positive, your film positive image should be exposed on to the mesh and you cleaned it, so it's ready to be use. If your using stencil, stick your stencil on the side of the mesh that you putting the medium on.Use masking tape to stick the stencil on.
-Making sure the wood/metal side of the mesh is facing you (the mesh sides can be made out of wood or metal or other materials).
-Now gather all the equipment you need (all the equipment you need is written on another post, under the same section "Printing").
-Right, now pick the kind of paper you want to use, to print. Then lay it out underneath the mesh, where the stencil/film positive print is.
-Now use a pallet knife to scoop some medium out, the colour you want and spread it out in a line,under the stencil/film positive image (still the same side of the mesh, the wood/metal facing you).
-Now put the squeegee where the medium is, use two hands and push the squeegee forward, push firmly.
-Don't push the medium right to the edge of the mesh! When you push forward and got pass your stencil/film positive, give the squeegee a little tuck, so most medium gets off the squeegee and stays on the mesh.
-That coat would be your first coating, it is best to have 2 coating, just in case you missed abit without knowing. The second coating would be from the top of the stencil/film positive, to the bottom. Use the same method to get most medium off the squeegee.
- Since your print is printed, get your pallet knife and scrape off any remaining medium off the mesh and the squeegee. THAT'S if, if you no longer want to print of want to use another colour, if you plan to use another colour, it is best to wash the mesh first.
-If you want to continue printing then, put the squeegee on the table. Life the mesh up carefully.
-Then using one hand to hold the mesh up and the other hand pealing the paper off the mesh.
-When you got your image out, use a small tub or something to hold the mesh up slightly. This is to prevent the mesh from touching the newspaper. As if the mesh touches the newspaper, some remaining medium will get on the paper. So when you come to do your following print, the back of your paper will have medium on it or if your printing a t shirt, you'll have some spots of medium at the back of your t shirt, which will ruin your print.
-Now when your done, use warm tape water to wash the mesh and other equipments, before the medium dries. As it would extremely hard to wash the medium off when it dries and it may ruin the mesh.

Happy Printing people!! :)


Wednesday, 2 May 2012

Analysing Thriller poster


The plot from IMDb-
"A brilliant plastic surgeon, haunted by past tragedies, creates a type of synthetic skin that withstands any kind of damage. His guinea pig: a mysterious and volatile woman who holds the key to his obsession."


-The typography, the colour red and white. I personally think that the white part of the font represent skin and the red, represent blood. To match the title "The Skin I Live In", as if you cut your skin you will bleed. It would give out a chill to the audience as they would expect some science related issue within the film, that maybe cringing.


-The colour used, silver grey. The way they used this colour within this poster, makes it seem like it is a clean cut place, like completely sterilised. A hospital or a lab, is where you generally would expect a clean and sterilised place to be, in a secure location. 


-The girl, she wearing a mask which does not seem like a normal mask you would wear, even if you go to a party. It seems like a special kind of mask, like it meant to support/help her face or skin(if there is something wrong with it), though such weird mask it makes you wonder what it is about. Also the lines from neck downwards and the fact that she is bold, it is not normal for a female. It makes you wonder what is going on with her, is she a test subject or is there something wrong with her? Moreover her facial expression, it does not seem like she is relieved or anything, but more towards scared or shocked. From how her eyes looks, it seems like it is giving that message out, as her eyes stares right into your eyes. 
As for the lines on her body, it gives out several different messages, such as markings you get before you do a plastic surgery, or a scar mark  and maybe a copy of the outline of the human doll that shows how different features within the body, such as the muscles layout.


-The guy, the fact that he is leaning over the girl it shows that he is the dominant one in this picture, as he is over powering her. From his expression, his eyebrows rises up, it seems like he is aiming for something, Such as if his experiment succeeded or he is prepared for the consciences of something he has done and he does not seem harmless. More or less the clothes he is wearing, a simple nice quality silk shirt, yet he does not give out a pleasant feeling. He is wearing the type of shirts that you would expect a business person or a rich person to wear. From this it tells the audience that this guy is not someone simple, he has power. As the girl looks scared and he doesn't, it could mean that he using this girl or controlling her.  


-This will scare the audience as the title " The Skin I Live In", they would not know what to expect to see. As experimenting with skin would mean bio, biological situation could only mean gruesome or crazy science, as your are playing with nature and you don't know what will happen nor what it would cause.


-Overall this will thrill the audience as science experiments tends to be kept top secret by the government or the the military.  Who knows what will happen when it becomes public or what it can cause.